Guide
How to Use a Wax Seal Stamp: Step-by-Step Guide
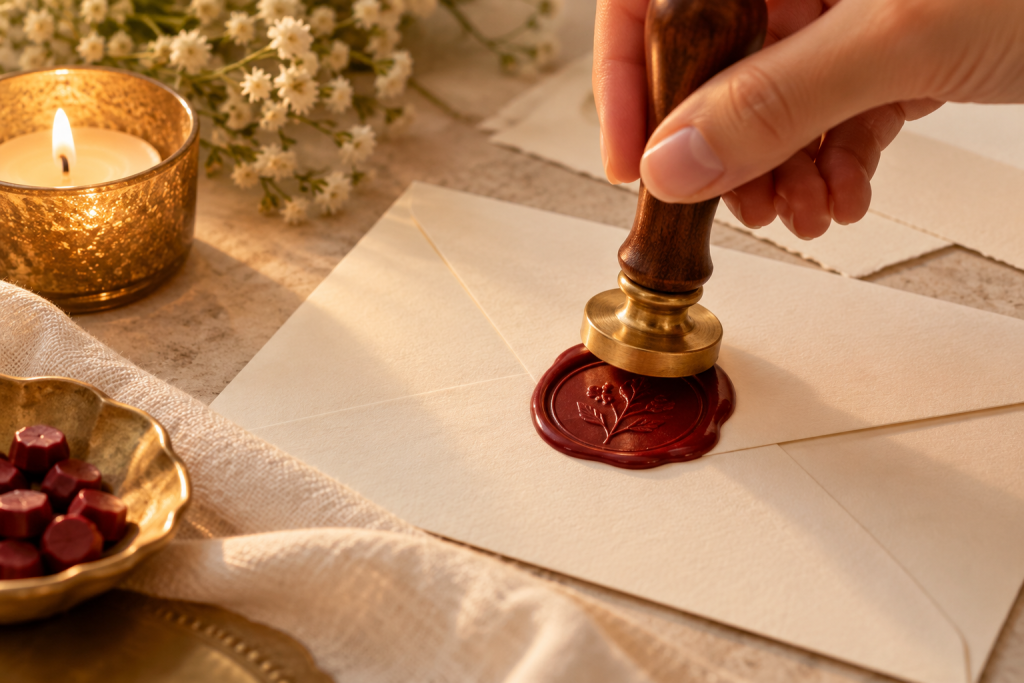
To use a wax seal stamp, melt your sealing wax, pour a small puddle onto the paper, press the stamp straight down for a couple of seconds, wait about a minute for the wax to harden, then lift the stamp straight up. That is the whole method. The rest of this guide covers what to gather, three ways to melt the wax (beads and a spoon, a glue gun, or a wick stick), and how to fix the problems that trip up almost everyone on the first few tries.
If you are brand new to this, a wax seal kit is the easiest start, because the stamp, handle, wax and melting tools are already chosen to work together.
What you need
Every wax seal, however you melt the wax, needs three things: a stamp with a handle, wax, and a safe heat source. Everything else is a convenience.
The stamp and handle
A wax seal stamp is a brass head with your design engraved in reverse, so it reads correctly once it is pressed into the wax. The head attaches to a handle, usually wood. Heads come as initials, florals, seasonal designs and custom artwork, and a handle can be paired with different heads over time. Browse our wax seal stamps to choose a design, and see wax seal tools for handles and other accessories.
The wax
Sealing wax comes in two main forms for stamp work. Sealing wax beads are small pellets that you melt in a spoon. Sealing wax sticks come either with a wick, which you light, or as slim sticks that fit a low-heat glue gun. Beads give you the most control over how much wax you pour. Sticks are quicker and tidier when you have a batch of envelopes to seal. We compare the two in a separate guide, so here we will cover how to use each.
A heat source
The classic choice is a tealight candle with a metal wax seal spoon held above the flame. A low-heat glue gun works for glue-gun sticks, and a wick stick carries its own flame. Whatever you choose, work on a hard, heat-safe surface, keep paper, sleeves and hair away from the flame, and never leave a lit candle unattended.
Useful extras
- A toothpick or small stir stick for melted beads.
- A paper towel or tissue to wipe the spoon while it is still warm.
- A cold surface, a damp cloth or a small bowl of ice to chill the stamp face.
- Scrap paper for practice. Your first few seals are rarely your best.
How to use a wax seal stamp, step by step
These steps apply to every method. Only step 2, the melting, changes, and the three variations below cover it in detail.
- Set up and chill the stamp. Lay your envelope or card flat on a heat-safe surface. Rest the metal face of the stamp on a cold surface or a wrapped ice pack. Note & Wish, a wax seal retailer, says a cold stamp helps the wax cool faster and helps prevent sticking.
- Melt the wax. Use beads and a spoon, a glue gun or a wick stick (details below). Melt only until the wax is liquid and smooth.
- Pour or drip a small puddle. Aim for a round shape just a little smaller than the stamp head. The stamp spreads the wax outward as you press.
- Check the direction of your design. Make sure the design will sit the right way up for how the envelope will be read. Once the stamp touches the wax you cannot adjust it.
- Press straight down. Lower the stamp level into the center of the puddle in one steady motion. Press firmly enough to fill the engraved lines, not so hard that the wax squeezes out the sides.
- Hold still and let it set. Note & Wish suggests pressing for a couple of seconds and then letting the wax harden for about a minute. Do not rock or twist the stamp while it sets, or the edges will smear.
- Lift straight up. If the stamp resists, wait a little longer rather than pulling. Wax that is still soft will tear.
- Clean up. Wipe the spoon while it is still warm (see the cleaning section below) and let the stamp cool before you put it away.
With beads and a spoon
This is the most traditional method, and it gives you the most control over the amount of wax.
- Put the beads into the wax seal spoon. How many depends on the size of your stamp head, and the section on beads per seal below gives a starting point.
- Hold the spoon over a lit tealight and keep it moving gently so the wax melts evenly. Stir with a toothpick if you like.
- Watch for bubbles. Note & Wish says that bubbling means the wax has over-melted. Lift the spoon away from the flame and let it settle before you pour.
- Tilt the spoon and pour slowly onto the paper, forming a circle just smaller than the stamp head, then press as in the steps above.
If you plan to seal several envelopes in a row, a wax melting pot keeps the wax liquid so you are not relighting a candle each time.
With a glue gun
A low-heat glue gun is a neat way to seal many envelopes quickly, such as a set of invitations. You need sticks made for a glue gun, like our glue gun sealing wax sticks, and a gun with a low-temperature setting. Ordinary hot glue sticks are not sealing wax, so do not substitute them.
- Load a sealing wax stick into the glue gun and let the gun heat up fully.
- Squeeze a little wax onto scrap paper first, to clear any old glue from the nozzle.
- Draw a small round puddle on the envelope, slightly smaller than the stamp head.
- Press the stamp straight down, hold, wait for the wax to set, and lift.
- Unplug the gun when you finish and set it on a heat-safe stand.
Check the temperature guidance on the sticks and on your glue gun before you start. A gun that runs too hot can scorch paper, and wax that is too cool will not flow into the engraving.
With a wick stick
A wick stick has a cord running through the wax. It melts as it burns, so there is no spoon to hold and nothing to stir.
- Light the wick and tilt the stick toward the paper.
- Let the wax drip into a puddle just smaller than the stamp head, as Note & Wish describes for wicked sticks.
- Set the stick down safely and snuff the flame before you press, so there is no open flame near the paper.
- Press the stamp straight down, hold, wait, and lift.
A wick stick can drip faster than you expect, so practice on scrap paper first.
How many wax beads per seal
The right amount depends on the size of your stamp head and how thick you like your seals. Note & Wish publishes a guide for its own standard 12 mm beads: 2 to 3 beads for stamp heads of 12 mm, 15 mm and 20 mm, and 3 beads for a 25 mm head. Other beads and heads may differ in size, so treat that as a reference point, not a rule.
The practical approach is to start small and adjust. Melt a few beads, pour, and press on scrap paper. If the wax does not reach the edges of the design, add a bead next time. If the wax squeezes far past the edge of the stamp, use fewer. Once you find the number that works for your stamp and your wax, note it down and your seals will come out consistent.
Common problems and how to fix them
Bubbles in the wax
Bubbles usually mean the wax got too hot. Note & Wish says bubbling is a sign the wax has over-melted. Take the wax off the heat and let it cool until the bubbles subside before you pour. Next time, melt more slowly and keep the spoon moving.
The stamp sticks to the wax
A stuck stamp usually means the wax has not set enough or the stamp face was warm. Chill the stamp before each seal, since a cold stamp cools the wax faster, and wait longer before lifting. If you feel resistance, do not yank. Give the wax more time and then lift straight up.
A smeared or blurry impression
Blurry detail usually comes from moving or twisting the stamp while it sets, from wax that was too runny, or from lifting too early. Press straight down, keep your hand still, and let the wax rest a moment after melting before you pour. If a seal is a miss, Note & Wish says the wax can be re-melted and reused, so you can try again.
The impression is incomplete
If part of the design is missing, you probably used too little wax or pressed unevenly. Use a little more wax next time and press with a level stamp so every edge meets the paper at the same time.
The seal chips or breaks
A seal that cracks when the envelope is bent was probably made with wax that is brittle once set. If your envelopes will be handled or mailed, look at the wax description on the product page before you buy, and browse our sealing wax range to compare.
Stray drops
Pour closer to the paper and a little slower. A steady, low pour reduces splashes. Keep a tissue handy to lift any stray drops while they are still warm.
Cleaning the spoon and stamp
The spoon
Clean the spoon while it is still warm. Note & Wish recommends wiping out leftover wax with a tissue or paper towel while the wax is still hot, which lifts it in one swipe. If you use a different color next, wipe the spoon first so the shades do not mix. If you need a spare, see our wax seal spoons.
The stamp
Most of the time the stamp needs nothing more than a quick look. If a thin film of wax stays in the engraving, let the stamp cool completely and lift it out gently with a wooden toothpick. Keep the stamp dry and store it somewhere cool.
Your work surface
Work on a surface that tolerates warm wax, such as a ceramic tile, so spills are easy to lift once they have set.
Next steps
Once you can make a clean seal on scrap paper, try it on real envelopes, gifts and cards. If you want to try sealing without a stamp, read our guide on how to make a wax seal. When you are ready to stock up, our wax seal kits bundle the essentials, and the stamp collection has designs for every occasion.
Frequently asked questions
When you press the stamp, Note & Wish suggests holding it for a couple of seconds and then letting the wax harden for about a minute before you lift it. Once the wax is set and the stamp is removed, the seal stays on the envelope or card. It is not meant to be peeled off.
It depends on the type of stick. A wick stick is lit and tilted over the paper so the melted wax drips into a small puddle. A glue gun stick is loaded into a low-temperature glue gun and squeezed out onto the paper. Either way, make a puddle just smaller than the stamp head.
Chill the stamp first, make a puddle just smaller than the stamp head, avoid over-melting so the wax does not bubble, press straight down without twisting, and wait until the wax has set before you lift. Practice on scrap paper to find the right amount of wax for your stamp.
Wipe it with a tissue or paper towel while the wax is still warm, as Note & Wish recommends.