Guide
Sealing Wax Beads vs Sticks: Which Should You Use?
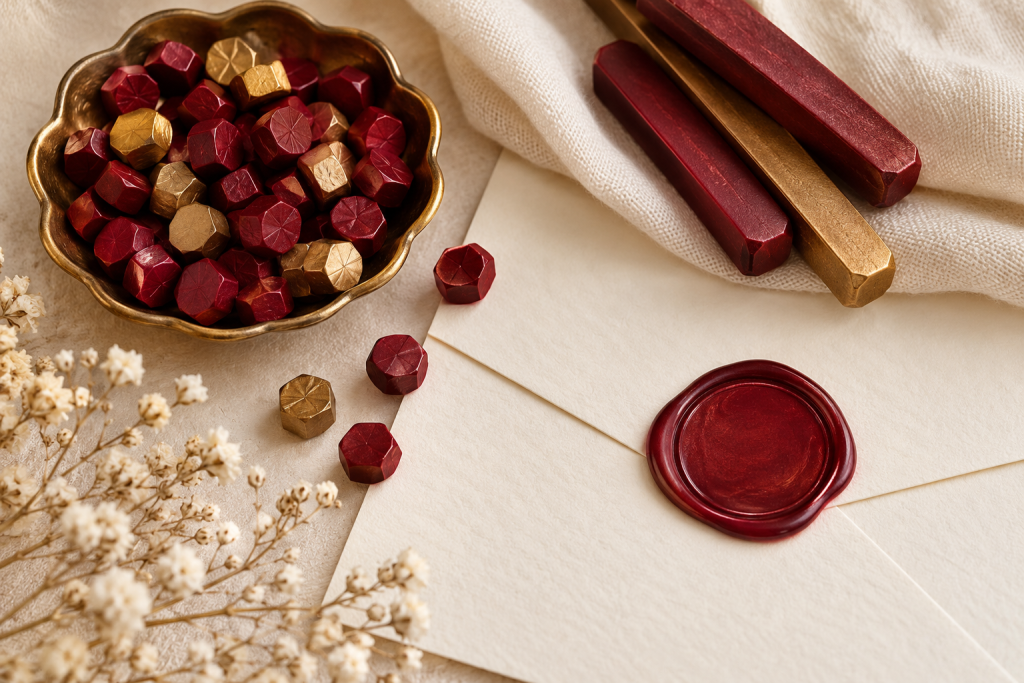
Short answer: choose beads if you want to blend colors and only need a handful of seals, choose glue gun sticks if you are sealing a stack of invitations or anything that will go through the mail, and choose sticks with a wick if you like the classic candle-drip look and do not mind a slower, messier process. Everything below explains why, so you can match the wax to the project in front of you.
Quick map of our shelves before we start: all of our sealing wax lives in two groups, wax seal beads and sealing wax sticks. The wax you pick changes the tools you need, how long each seal takes, and whether the finished seal survives a trip in a mailbox.
The quick comparison
| Method | Melts with | Best for | Color mixing | Survives the mail |
|---|---|---|---|---|
| Wax beads | Spoon and flame, or a melting pot | A few special seals, custom colors | Easy, you blend beads in the spoon | Depends on the wax formula, check the listing |
| Glue gun sticks | Low-temperature glue gun | Batches, wedding invitations | Limited, you work one color at a time | Yes, this is what flexible wax is made for |
| Sticks with a wick | The lit wick itself | Single seals with a classic drip look | Not practical | Not guaranteed, see the flexible vs brittle section |
| Traditional sticks without a wick | Held over a candle or melted in a spoon | Heirloom-style, glossy seals | Possible in a spoon, takes practice | Usually brittle, not for mailing |
We left a cost-per-seal column out on purpose. How much wax a seal uses depends on the size of your stamp head and how thick you pour, and we do not want to print a number we cannot back up. If you want to work out your own figure, weigh a bag of wax, make five seals, and divide.
Wax beads
Beads are tiny pre-formed pieces of sealing wax. You scoop some into a spoon, melt them over a flame, pour the puddle onto your envelope, and press the stamp in. Heirloom Seals describes the method the same way: melt the beads gently in a spoon over a flame, then pour directly onto your surface before making the impression.
Why people like beads
Beads are the easiest way to mix colors. Drop a few gold beads and a few burgundy beads into the same spoon and you get a marbled seal that no packaged color will match. Heirloom Seals also points out that beads are handy for seals in several colors. If you like experimenting, browse our wax seal beads and add the metallic beads for shimmer.
How many beads per seal
There is no universal count, because it depends on the stamp head. A small initial stamp needs far fewer beads than a large floral head. Start with a small scoop, melt it, and see how much of the stamp face it covers. If the wax squeezes out past the edges, use less next time. If the impression comes out thin and patchy, use more. After two or three seals you will know your own number.
The catch
Beads are a one-seal-at-a-time method. Every seal means scooping, melting, pouring and pressing, and you need a flame and a steady hand. That is perfect for ten seals and tiring at one hundred.
Glue gun sticks
Glue gun sealing wax comes as slim sticks that fit a standard glue gun. You load the stick, squeeze out a blob of wax, and stamp. No flame, no spoon, no drips on the table.
Built for volume
Heirloom Seals recommends this format for making large quantities of seals, and that matches how wedding stationers and crafters use it. If you are sealing a full set of invitations, glue gun wax saves real time, because each seal is one squeeze and one press. Our glue gun sealing wax sticks are the ones to start with, and our wax seal kits bundle the wax with a stamp if you want everything in one box.
Use a low-temperature gun
Heirloom Seals notes that its glue gun wax is made for standard 7mm or 11mm glue guns and recommends a low-temperature gun rated at 105°C. That is a sensible rule for any glue gun wax: check the stick diameter before you buy, and use a low-temperature gun so the wax flows without scorching or running thin. A regular high-temperature craft gun can leave the wax too runny to hold a clean edge.
Planning invitations?
For the full workflow, including how many seals to order and how to attach them, read our guide to wax seals for wedding invitations.
Traditional sticks with a wick
A wicked stick has a cotton wick running through the middle, so the stick is its own candle. Light the wick, tilt the stick over your envelope, let the wax drip, then stamp. Heirloom Seals sums it up as light the wick, drip the wax, then stamp the impression.
The look
Dripping from a lit wick leaves small dots of wax around the impression, which gives the seal a rustic, handmade look. Some people love that. Others find it hard to control, especially on a finished invitation where one stray drip is permanent.
When it makes sense
Wicked sticks are a fine choice for a single letter, a journal, or a gift where the drip is part of the charm. They are not the fastest option, and they are not where we would start for a batch. Experienced sealers on the r/WaxSealers subreddit also describe plain sticks without a wick as harder to use than glue gun wax or beads, because you have to hold them over a candle yourself.
Flexible vs brittle sealing wax
This is the difference that matters most if your seal has to travel.
Flexible wax
Flexible wax is formulated so the seal does not shatter when it is bent or dropped. Heirloom Seals says its glue gun sticks are flexible and calls them the right wax for seals that will be used on invitations or in the mail. If your seal is going on a wedding invitation, choose a wax listed as flexible.
Brittle wax
Brittle wax is the traditional style. Heirloom Seals says its Bank of England wax cracks and crumbles when the envelope is opened, that a broken seal cannot be restored, and that it is not recommended for mailing. That makes brittle wax a good choice for display pieces and hand-delivered letters, and a poor one for the post office.
Mailing rules
Whether a particular carrier accepts a wax seal, and how thick it can be, is up to the carrier. Check the carrier’s own current guidance before you mail a batch, and test one sealed envelope first. Our guide to wax seals for wedding invitations covers sending seals by mail in more detail.
Melting pot or spoon?
If you go with beads, or with plain sticks you melt yourself, you need something to hold the wax.
A spoon is the simple start
A wax seal spoon is cheap, small and fast. You hold it over a candle, melt a few beads, and pour. It is ideal for one-off seals and for mixing colors by eye. Our wax melting spoon is the usual first purchase.
A melting pot or furnace is for repeat seals
If you are making many beaded seals, a wax melting pot keeps a batch of wax melted and ready so you are not re-lighting a spoon for every seal. It also keeps your hands further from the flame. The tradeoff is that a pot holds one color at a time, so it suits batches better than marbling.
Which to buy
Making a handful of seals, or you want custom colors: spoon. Making dozens of the same color from beads: pot. Making dozens and you would rather skip melting altogether: go back to glue gun sticks.
FAQ
Neither is better for everything. Beads are better for blending colors and making a few seals, because you can mix them in a spoon. Glue gun sticks are better for batches and for mailing, because they are quick and come in flexible formulas. Pick by project: beads for creative one-offs, sticks for volume.
It depends on the size of your stamp head. Start with a small scoop in the spoon, melt it, and check how much of the stamp face it covers. Use less if wax squeezes out far past the edge and more if the impression looks thin. After a few seals you will know the right amount for your stamp.
Yes. Candle wax is made to burn, while sealing wax is made to melt into a puddle, stick to paper and hold a crisp impression once it cools. Sealing wax also comes in flexible and brittle formulas, which matters if the seal will be mailed. Do not substitute a candle for sealing wax.